4.1. Version control (git)
Using a version control system (VCS) is an essential requirement for responsible programming and even more so software development. Besides that, you can use version control systems for much more than source code. Think of your thesis written using LaTeX… that’s basically nothing else than source code with a few binary artifacts (mainly illustrations).
Important
While git is the actual version control system, there are a number of (web) interfaces that get sometimes confused with git itself, such as GitHub, GitLab, or (for those interested in a more light-weight solution for self-hosting) Gitea. For details, see the dedicated section below.
4.1.1. Why version control?
There are several excellent reasons for using a version control system when developing software (or even just starting to write a few short scripts for initial data analysis):
reproducibility and traceability
You can always check how your code has evolved – and mostly guess what version was used when.
Combined with version numbers and a system that automatically tracks and logs which version was used when, you end up with fully reproducible processes (e.g., data processing and analysis, hence reproducible research).
synchronisation
It is easy to keep code synchronous over different places – even if you change it on several places independently and in parallel (due to extended conflict management and merging capabilities).
freedom
Your (working) code is just one single command away… hence you can try whatever you like without fear.
Furthermore, you need not to comment out (temporarily) unused code. Again: the previous version is just one step away.
As strange as it may sound, the last argument (freedom) is the most crucial. There are few things that change habits in programming and hence style and quality of resulting programs more than introducing version control systems.
4.1.1.1. Why git?
To quote Harry J. V. Percival [Percival, 2017]: “We’re using Git as our VCS, ’cos it’s the best.” To give you at least a few more (and less opinionated) arguments:
distributed version control system
The slogan of git is: “everything is local”. Hence, you need no network infrastructure to work with git. Wherever you are (German trains, lonely island), you can work undisturbed by not having any network (and hence internet) connectivity.
well-tried
Git is used for a multitude of large-scale projects, inter alia for developing the Linux kernel (for which it was originally developed).
Furthermore, there is a clear update path through decades of version control systems, from CVS to SVN to git, and even (bi-directional) integration for git and SVN. Hence, using git today is most probably a safe investment in the (far) future.
widely used
Git has a large community, hence it is easy to get help. Furthermore, it comes with excellent documentation freely available online: the “Pro Git book”.
For further details on git see its homepage. It comes with excellent documentation freely available online: the “Pro Git book”. For installing git, read its chapter on how to install git on your operating system.
4.1.2. Git fundamentals
Before diving into using git, just a recap of a few fundamental aspects of git that may be different from other version control systems and help to get you started.
4.1.2.1. Everything is local
Git is fundamentally a distributed version control system. That means that every local copy (residing in a directory of your choosing) is a full repository, containing the full history of everything you ever did. This has two key consequences and advantages:
independent of network infrastructure
Wherever you are (German trains, lonely island), you can work undisturbed by not having any network (and hence internet) connectivity.
cheap (and fast) operations
Branching, merging and alike are cheap and hence fast, as they are entirely local. No network latency, no bandwidth limitation.
That does not mean, however, that you cannot synchronise different local repositories. You can easily add “remotes” and even use those for synchronising your code between different local computers. Eventually, platforms such as Gitea/GitLab/GitHub are 24/7 accessible (full) copies of your repository. For details, see below.
4.1.2.2. Two steps for creating a revision
Creating a revision (a version) of your work is a two-step process:
adding files to the staging area
With the command
git addyou add those files that you would like to be part of your next commit/revision to the staging area.creating a new revision (commit)
With the command
git commityou create a new revision (version) of your project.
It is always an excellent idea to check which files are in the staging area, hence marked for the next commit, before committing. Use git status for this. For further details, see below.
4.1.2.3. Command syntax and help
The general syntax of git commands is as follows:
git <command>
with <command> being something like init, status, add, commit. For further details for each of those (and other) commands see below.
For each command, you can get (detailed) help on the command line:
git help <command>
Hence, whenever in doubt how to use a particular git command, RTFM.
4.1.3. Git basics: getting setup and started
Once you have worked your way through this section, you will have installed git (if not already there), created your first repository and created your first revision (i.e., made your first commit). This should get you started for most of the day-to-day tasks.
4.1.3.1. Installing git
For installing git, read its chapter on how to install git on your operating system. If you are working with Linux, chances are that git is already installed.
After you have successfully installed git, and in every case before first using it, make sure that you configure it at least fundamentally (at least your name and email address should be set to valid values). For details, see below.
4.1.3.2. Create a local repository
Here we are, with git installed on our computer, ready to start. Hence, open a terminal (if not already done so), change to the directory of your project you want to have under version control, and issue a single command:
git init
That’s it, you’ve created your first repository. The resulting output on the terminal should look similar to the following:
Initialized empty Git repository in /path/to/your/repo/.git/
Where /path/to/your/repo/ is the path to the current directory.
Note
It does not matter whether there are already files in the directory you created your repository in. Hence, it is possible (and a frequent use-case) to convert an existing project into a git repository.
4.1.3.3. The .gitignore file
Before you start to happily create revisions of your project, there is one important thing: temporary files and artifacts that can be recreated from the sources should not be under version control, as they change frequently and just clutter your revision history, masking and hiding the actually important changes.
Git comes with an easy-to-use built-in mechanism to ignore files that shall not be version controlled: a file named .gitignore in the root directory of your repository. Note the leading dot, making this file a hidden file for unixoid file systems. An example of a typical .gitignore file for a Python project may look as follows:
**pyc
**swp
**__pycache__
**venv
**config.py
**.cache

# macOS-specific files
.DS_Store

#PyCharm project configuration files
.idea

# Compiled python modules.
*.pyc

# Setuptools distribution folder.
/dist/
/build/

*.egg-info
*.egg

# Sphinx templates and build
docs/_build
docs/_static
docs/_templates

# Temporary files from tests
tests/*tex
As you can see, you can specify both, explicit files and directories as well as patterns using wildcard characters. Furthermore, sometimes you are interested in generally excluding a certain file type (e.g., PDF files in LaTeX context), but add the same file type if it appears in a directory (e.g. PDF files of figures in a LaTeX context). Hence, there is a pattern for explicitly excluding files from being ignored:
!figs/*.pdf
The above statement in a .gitignore file will include all PDF files in the figs directory, but ignore them everywhere else.
4.1.3.4. My first commit
If there are already some files in the repository or if you have created some files (don’t forget the .gitignore file, see above), it is time to create the first revision (version), i.e. make your first commit. Remember: This is a two-step process – first you add the files to the “staging area”, then you you create the actual revision.
4.1.3.4.1. Inspect changes
Before adding files to the staging area, it is always a good idea to inspect what we have done:
git status
In case of an empty repository without any commits (newly initialised) and a .gitignore file just created, the resulting output would look something like:
On branch master

No commits yet

Untracked files:
  (use "git add <file>..." to include in what will be committed)

    .gitignore

nothing added to commit but untracked files present (use "git add" to track)
Most git messages are self-explaining. As usual, those who can read have a clear advantage.
In case there are previous commits/revisions, you can have a look at the difference to the last commit:
git diff
The output takes some getting used to at first, in particular with several files, as they are displayed in sequence. If the output is longer than the current terminal window height: Navigate with the arrow keys, exit the comparison view with q.
4.1.3.4.2. Stage (all) changes
If you want to stage all changes, simply type
git add .
The dot refers to the current directory and works recursively, meaning it includes all subdirectories. If you do not want to (blindly) add all changes, you can explicitly specify files using the git add command, and can make use of the usual wildcards and patterns.
After adding the files to the staging area, once again review what you have just done:
git status
In case of the situation as described above (empty freshly initialised repository, no previous commits, only the .gitignore file being added) the output of the command should look like:
On branch master

No commits yet

Changes to be committed:
  (use "git rm --cached <file>..." to unstage)

    new file:   .gitignore
If you accidentally added a file to the staging area that you do not (yet) want to be committed, you can revert this exactly as the previous command output told you:
git rm --cached <file>
Again, as usual, reading what a program tells you can be very helpful. And git in particular is quite gentle in this respect.
4.1.3.4.3. Commit: create new revision
Suppose that everything is fine and according to your wishes. It’s time then to create our first revision, i.e. finally perform our first commit:
git commit -m "<description>"
Important: Each commit should have a short description, which is specified via the -m parameter (if you forget to add the -m switch, git will open an editor for you). Replace <description> between the double quotes accordingly with a compact description. The description should concisely summarise the changes. The actual changes can be easily tracked using tools provided by git (git diff).
An example:
git commit -m "Initial commit"
The resulting output on the terminal should look similar to:
[master (root-commit) 44bc177] Initial commit
 1 file changed, 2 insertions(+)
 create mode 100644 .gitignore
Of course, the hash (“44bc177” in this case) will look different for you, but generally, it should be comparable.
However, if the user’s name and email address have not yet been configured (which is the normal case with a fresh installation of git or a first-time use), the output looks somewhat different:
 Committer: Till Biskup <till@Tills-MBP.fritz.box>
Your name and email address were configured automatically based
on your username and hostname. Please check that they are accurate.
You can suppress this message by setting them explicitly. Run the
following command and follow the instructions in your editor to edit
your configuration file:

    git config --global --edit

After doing this, you may fix the identity used for this commit with:

    git commit --amend --reset-author

 1 file changed, 2 insertions(+)
 create mode 100644 .gitignore
In this case, you should follow the instructions given. The configuration will be stored in the file .gitconfig in the user’s home directory. For details of such a file see below in the section “Configuration”.
Afterwards checking shortly with
git status
shows that everything is in good shape:
On branch master
nothing to commit, working tree clean
Hooray! You’ve done your first commit. It doesn’t get much more complicated at first if you are working alone on a project and want to have the benefits of version management. Comparing different versions etc. is something for later, details can be found in the official git documentation.
4.1.3.5. Configuration
Git stores the name and email address of the contributor for each revision. It therefore makes sense to store correct values here. The information is stored for each user in the .gitconfig file in their user home directory.
An example of such a file could look like this:
[user]
    name = John Doe
    email = doe@example.com
You can set many more parameters here, and a more advanced example of a .gitconfig file may look as follows:
[user]
    name = John Doe
    email = doe@example.com
[core]
    editor = vim
[color]
    status = auto
    branch = auto
[alias]
    ci = commit
    st = status
    co = checkout
Here, the git messages are displayed in colour, and a number of aliases for git commands are introduced that can sometimes simplify your life immensely. Whether you would like to set the default editor (the one opened, e.g., when you forget to add the -m switch when committing) to vim as in the example above is clearly a matter of taste.
4.1.4. Remotes: Synchronising several instances
One of git’s slogans is: “everything is local”. This is one of the unbeatable advantages of distributed version control systems: no dependence on internet connection and servers, correspondingly fast local actions.
Nevertheless, a common use case of git is to keep the code base of a project (be it the LaTeX sources of a paper, a programming project, or else) in sync on multiple computers – not to mention working on a project together. For this purpose, there are “remotes”, git repositories that serve to synchronise several local repositories. The commands git push and git pull are used to mirror commits to these repositories or to retrieve them from there. git’s distinctive ability to handle different versions and files that have been changed in several places at the same time makes synchronisation correspondingly easy or at least easier.
4.1.4.1. Add a remote
The general syntax for adding a remote to a repository is as follows:
git remote add <Name> <URL>
This requires the remote to already exist, e.g. a repository created via the web interface of GitHub or a GitLab or Gitea instance. Usually, these platforms also show the commands that have to be executed locally to add the remote.
A special name for a remote is origin, which is the default remote that you do not have to specify for git push and git pull (and that is set by default if you clone a repository from some remote).
Accordingly, once you have created a remote on GitHub/GitLab/Gitea, you execute this command:
git remote add origin <URL>
You can have an arbitrary number of remotes, they only need to have different (preferrably meaningful) names.
To display the existing remotes in detail, use the command:
git remote -v
Two lines are displayed here, one for fetch (get changes locally), one for push (publish changes).
4.1.4.2. Push commit to remote
If a remote is specified locally, the local changes can be published:
git push
If no name is given for a remote, “origin” is used implicitly.
Note
It is always advisable to do a git pull first and incorporate any remote changes locally before publishing (pushing) local changes. If the local changes are incompatible with the state of the remote, the publication will be rejected.
4.1.4.3. Pull commit from remote
To pull changes from a remote to the local git repository, use the command:
git pull
If changes have occurred locally, git will issue appropriate notices and try to merge the changes automatically as far as possible. Manual work may be necessary.
Note
As a general rule, always perform a git commit first locally before doing a git pull in order to have a defined local state.
4.1.4.4. Daily git workflow
Before dealing with how to make communication with remotes simpler and more convenient, a short break for some general advice for a daily git workflow, assuming that you have at least one remote. When starting to work on your project, always perform a git pull first, or to be more exact:
git status– check what’s going ongit commit– only if there are some local changesgit pull– make sure you have the latest changes
The same is true for when you finish working on your project, and “finish” here basically means: leaving your desk:
git status– check what you’ve donegit add– add your changes to the staging areagit commit– make a new commitgit push– push your changes to your remote
And in case of fire:
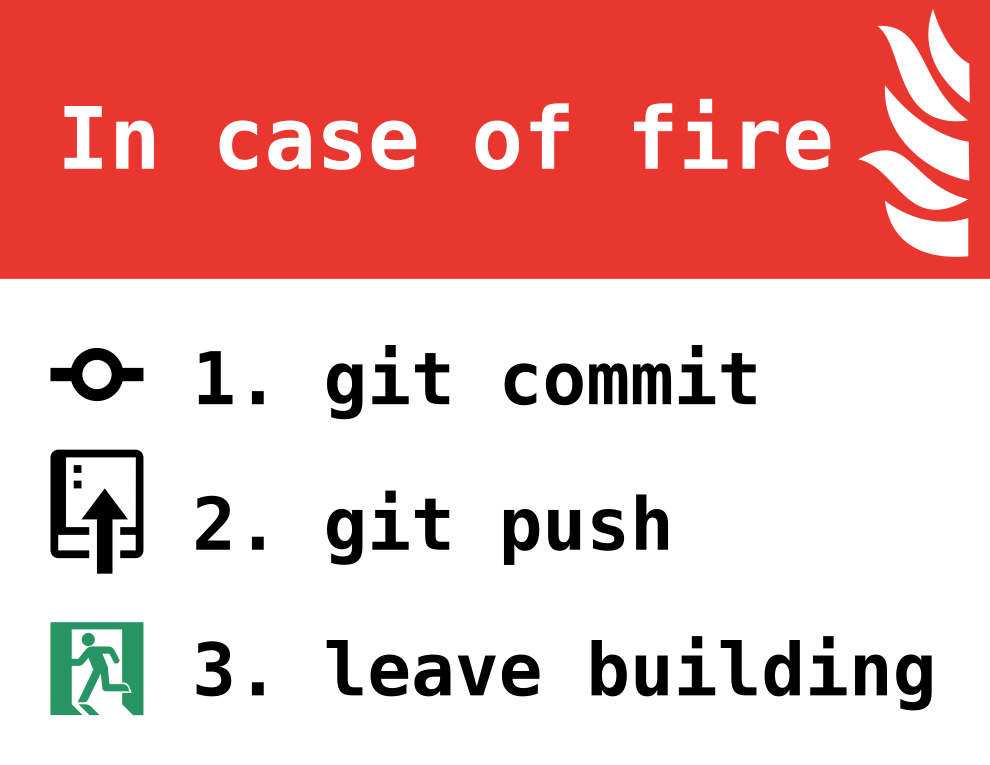
Fig. 4.1 “In case of fire”. This poster surfaced on Twitter around October 2015 and is (c) Louis-Michel Couture, with an MIT license. The original git push and git commit icon are (c) Github. The original files can be found on Louis’ GitHub repository.
4.1.4.5. Communication: SSH keys
Usually, access to a remote repository is limited to certain users who have to authenticate themselves beforehand. Since it is tedious to enter the user name and password each time, there is usually the option of using an SSH key (more precisely: a key pair consisting of a public and private key) for authentication.
Under Linux and macOS, the key pair is located in the directory .ssh/ in the home directory of the respective user. The default key is id_rsa.pub or id_ed25519.pub (public key). If this key already exists, it is easiest to store it on the respective platform (GitHub, GitLab, Gitea). If there is no corresponding key, it must first be generated:
ssh-keygen -t ed25519 -C "<comment>"
or in case of an RSA key with 4096 bit:
ssh-keygen -t rsa -b 4096 -C "<comment>"
In both cases, the <comment> part is purely optional, but helpful to know where the key belongs to.
Here, all questions should be answered by pressing the “Enter/Return” key and thus the default settings selected – except of when you already have a key and want to create another key just for interacting with a git remote. The keys are then stored under ~/.ssh/id_ed25519.pub (public) and ~/.ssh/id_ed25519 (private) – or similar, depending on the cryptographic algorithm you have used above.
Important
The private key must never fall into the hands of others.
The content of the file ~/.ssh/id_ed25519.pub can then be uploaded to the respective platform (GitHub, GitLab, Gitea). In order to display the content on the terminal and thus be able to copy it easily, under Linux/macOS use the command
cat ~/.ssh/id_ed25519.pub
and copy the output to the respective platform.
Gitea: The key is added under “Settings” ⇒ “SSH/GPG Key”. The “Settings” menu is reached by clicking on the user icon (in the top right corner).
GitLab: The key is added via “Preferences” ⇒ “SSH keys”. The “Preferences” menu can be accessed by clicking on the icon for the user (in the top right/left corner).
GitHub: The key is added via “Settings” ⇒ “SSH and GPG keys”. The “Settings” menu can be accessed by clicking on the icon for the user (in the top right corner).
4.1.5. Branches
One of the features where git shines is its easy handling of branches. Branches let you separate different aspects of your work, and they are regularly used in software development to develop features or to separate stable production versions from development versions.
Whenever you work with git, you are working in a branch, so there is nothing special about it. The default branch of a new repository is either “master” or “main”. While historically, “master” has been used, recently many people advocate for using “main” instead, as “master” can be seen as a reference to slavery.
For the time being, for an introduction to git branches, see https://www.git-scm.com/book/en/v2/Git-Branching-Branches-in-a-Nutshell.
4.1.6. Conflicts: merging, stashing
Most of the time, working with git is rather smooth, particularly so if you are the only person working with a project and if you are reasonably organised to always stick to the general workflow and sequence of commit/pull and commit/push when starting/finishing to work on your project every single day, as advocated for above. However, sometimes things seem to go wrong, i.e. there are different conflicting changes in different places.
Usually, if there are some changes, git automatically takes care of that for you and merges the changes into your local repository. However, sometimes conflicts arise that git cannot deal with automatically an on its own. Nevertheless, git provides you with a number of tools that help out in this situation. Actually, this is what version control systems have been designed for in the first place.
For the time being, just have a look at the respective chapters of the “Git Book” available online:
For merging conflicts git cannot automatically merge, see: https://www.git-scm.com/book/en/v2/Git-Branching-Basic-Branching-and-Merging#_basic_merge_conflicts
For stashing, see: https://www.git-scm.com/book/en/v2/Git-Tools-Stashing-and-Cleaning
4.1.7. Collaboration: pull requests
As long as you are the only person working on a project, you can happily push/pull to and from your remotes. Even in a small group with equal partners, pushing and pulling to and from the same branches is usually no problem. However, the “official” way of contributing to a project managed by git is to clone it locally and check out a feature branch or alternatively to fork it, and after having made your changes, to issue a pull request with your changes to the original repository/branch.
This is a scenario where web interfaces such as Gitea, GitLab, and GitHub come in quite handy, as they provide excellent support for those operations.
4.1.9. Using web interfaces: Gitea, GitLab, GitHub
While git is the actual version control system, there are a number of (web) interfaces that get sometimes confused with git itself, such as GitHub, GitLab, or (for those interested in a more light-weight solution for self-hosting) Gitea.
Again: Quite some people neither familiar with git nor with software development easily confuse git with GitHub and alike. However, this is a mistake and a pitty. GitHub in particular is a commercial platform (currently owned by Microsoft) that (still) allows users to create free accounts and share their projects they have under version control using git. Git, on the contrary, is an entirely free (and actively developed) version control system that runs on all major operating systems and by design does not need any external infrastructure (remember: “everything is local”).
There are some excellent reasons to use web interfaces such as Gitea, GitLab, or GitHub, some of which shall be mentioned below:
You would like to share your projects with others/a larger community
You would like your projects to become visible (and you as a person/programmer as well)
You would like to easily synchronise your projects between computers
You want to go to town with such things as pull requests and collaborating
You look for a simple, yet powerful solution to integrate your version control system with a bug tracker and issue management tool.
These are all perfectly valid reasons for using web-based interfaces to git. However, be aware of the differences between git (the VCS) and these tools (nice, cosy interfaces that hide an awful lot of things), and have in mind that those web interfaces tend to integrate too many things.
Important
Web interfaces for git are great and convenient and can help a lot. However, two things are important to understand before using them:
Git is distinct from Gitea/GitLab/GitHub. While git is the version control system, Gitea/GitLab/GitHub are “just” cosy interfaces to make our life easier.
While using a cosy interface can boost productivity and ease our lives, we shall always be able to perform the same actions on our own and fully understand what we are doing.
Furthermore, these web interfaces tend to integrate many different tasks, such as issue tracking and wikis, for some of which other and independent tools are often better suited (Unix philosophy: do one thing, and do it well).
After all, which tools to use? Some general advice:
Use the tool available locally.
If there is a GitLab instance available locally for you, use it. If your company uses a private (and expensive) GitHub group account, use it.
Looking for a self-hosted, comparably light-weight solution: Gitea is your friend.
You can host GitLab on your own hardware for free. However, the hardware requirements (CPU, memory) are quite high, and the setup and in turn the maintenance tends to be complicated.
If you happen to have access to own hardware with network access and look for something “smaller”: Gitea can easily be run from within a docker container and is rather relaxed with respect to its hardware requirements (a NAS or Raspberry Pi may do).
Want you and your projects to be visible? Create a GitHub account and make it your business card.
Some may strongly disagree, as GitHub is a commercial company now owned by Microsoft. However, it has become a de facto standard for sharing your (public) projects with the world - like it or not. (The older of you may remember SourceForge that was once a home for many open-source projects.)
Keep in mind that for everything local or at least vaguely private or sensitive, you shall not use GitHub (or a publicly accessible GitLab space). Don’t use a public GitHub repo as a backup for your data/work.
In the end, use the tools that suit your needs, but spend some time looking into the details and getting your head round what you need before you start using something. As usual: think before you start.
4.1.10. Git and binary files
Sometimes the question arises: Can I put binary files in version control using git as well? The fair answer is something in between “yes, of course” and “no, not really”, depending on what you intend to do.
Simply speaking, you can put every file that exists somewhere on your file system under version control using git – permitted sufficient space. However, git as most version control systems has been designed to operate with text-based file formats. Therefore, all the convenient features of git (and other version control systems) such as a “diff” view and easy tracking what exactly has changed between versions (revisions) are usually only available for text-based files.
As soon as you put binary files under version control using git, you will be able to checkout whatever version of the binary file you have made known to git (by means of committing a revision). However, you will usually not be able to use all the other tools, such as a “diff” view.
Generally, binary files in context of programming (and, for the sake of argument, typesetting with LaTeX and alike) are derived artifacts that can be entirely rebuilt from the sources. Hence, there is no need to put those artifacts under version control. Actually, you should actively exclude them using the .gitignore file described above.
Having that said, you may well use git to track your data and alike. However, if you plan to go in that direction, this is (i) an entirely different topic compared to scientific programming and software development (rather something nowadays referred to as “research data management”), and (ii) you may have a closer look at a tool called git-annex that has been designed for exactly those scenarios and can be thought of as a plugin-like git extension for (large) binary artifacts.